
If you’re aware of what’s happening in the world of photo editing software, you’d know that Luminar 4 has been in the news for quite a bit of time.
The constant innovation of products from Skylum Software means there are very many surprises of their customers. Not only will there be surprises but also innovation along with a pinch of controversy. Luminar 4 will have it all.
Luminar 4 Review: A New Era of Photo Editing
A drastically streamlined interface is the surprise! If you’re a new customer, you’d be content with what they offer but if you were already using their services, you have to upgrade in order to get what you want.
The mix and match filters that came in the previous version of Luminar are all gone and the filters are condensed, consolidated and streamlined and the workspaces are closed to only four. To know more on this photo editing software, read on the review.
A quick look at the Pros and Cons
If you’re using Luminar 4 for the first time, you’ll be blown away by its simple and smart interface, easy organization of image, one-click ‘Looks’, incredible AI Sky Replacement feature, and nice tools for enhancing portraits.
On the contrary, if you’re using Luminar 3, you will simply love the brand new user-interface and another drastic shift in direction. Here are the pros and cons.
The PROS
- Integrated image catalog.
- AI Sky replacement feature.
- Non-destructive editing.
- Includes plug-in version.
The CONS
- Dramatic change in interface from v3.
- Doesn’t have virtual copies.
- Lack of subtlety in ‘looks’.
Pricing and Plans of Skylum Luminar
Luminar is directly available from the Skylum site for $69 and you don’t need to subscribe in order to get hold of its features. This is not there in the Windows app store but it is present in the Mac App Store.
Clients usually prefer desktop apps that are available in the app stores as they make installing and updating on several computers easier. They offer a 30-day trial and this download is available from the menu of the main site.
You can optionally install Luminar as a Lightroom Classic or Photoshop plug-in as the non-classic version doesn’t have any plug-in support.
It does overlap with tools that are found in the photo software of Adobe but Lightroom Classic is definitely the gold standard in workflow software. Therefore, installing Luminar as a plug-in can always make sense.
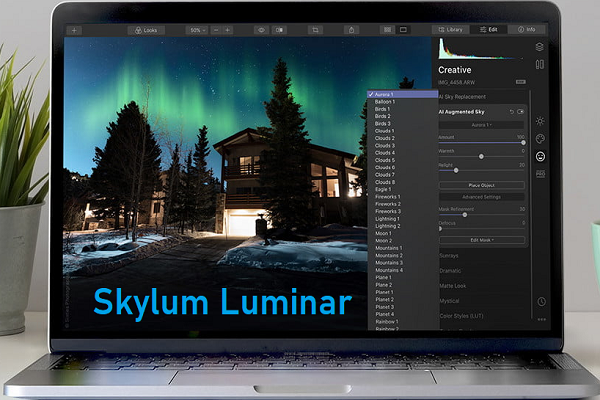
The dramatic user interface of Skylum Luminar
Luminar dons a slick-looking, clear, dark gray user interface with flat and modern icons. It is pretty customizable, you are allowed to select which adjustments will appear on the control panel on the right hand side.
However you are not allowed to totally pull off panels and place them wherever you like. Luminar doesn’t have any mode buttons to alter the interface for taks like Organize and Develop.
The eye icon will switch over the image display to the unedited original and the other icon will let you see those in a split view. Both the version can be seen side by side.
With the help of the mouse wheel, zooming seems pretty easy or you can also do this from the top of the program window. There is also Reset Adjustment button which is always on display.
Import and Organize
There is no separate Import button but there is a plus-sign button (similar to that you find in MacOS) that gets lets you start adding images to the app. The file menu has an ‘Import’ option that allows you to transfer images from a card. Other apps will allow you to apply presets, keyword and naming tags during import.
The photos will appear in a tiled form in the central app area. There will be buttons for color-coding, favoriting and also for picking and rejecting. These can also be applied in the thumbnails.
You’ll also be elated to see that Skylum has added search capability to this program. This is shown in Library mode only and also only in gallery display. You’d even wish it responded to the Ctrl+F keyboard shortcut.
The search capability also lacks DXO PhotoLab and the ability of Lightroom Classic to search by image attributes like lens and focal length and any other text in the file name.
In order to categorize photos, you may even use color-coding, pock and reject buttons and rating stars. It is not however possible to assign keyword tags to photos, that can simplify locating shots in a larger collection. Luminar doesn’t allow you to filter by the color codes and this makes them not too useful.
Develop and Adjust
For raw camera file conversion, Luminar has one of its own raw-developing profiles, Luminar Default. But you may also choose Adobe Standard and any profile that it gets from your camera.
For instance, for a Canon EOS 6D, the options are Landscape, Faithful, Neutral, Standard and Portrait. The favorite raw conversion tool for clients would be Capture One but Lightroom can still get close, offering several conversion options.
Switching the right panel into Edit mode brings a customizable group of adjustments. You will find the Essentials set of controls, buttons at the far right that will allow you to switch among Essentials, Creative, Dramatic HDR, Sky Replacement and Texture Overlay.
For any of such adjustments, you may use a mask or a brush, where the mask can be radial, gradient or luminous.
Luminar Looks
No, these Looks aren’t Instagram filter but they are expert-looking filter effects. You can get more than 70 filters in Luminar that range from black and white choices to Golden Hour and Soft Portrait.
You won’t get the specific film looks like you would in DXO PhotoLab and ACDSee but the choices are substantial.
And you can buy through the collections of Skylum’s online marketplace with themes geared towards cinematic, landscapes and travel.
Therefore, if you’re someone who wishes to use the best photo editing software at a reasonable cost, you may choose Skylum Luminar due to the wide array of options that you get. Take into account the above mentioned features before choosing any pro software for editing photos.